Category Archives: Uncategorized

What is a plumbing preventative maintenance plan?

plumber making notes on a clipboard

Why is plumbing maintenance important?

When was the last time you had your home’s plumbing inspected? Yeah, that’s what most homeowners will say – never. One of the most helpful p plumbing tips a homeowner can take to heart is to keep a regular plumbing maintenance routine and have annual plumbing maintenance by a professional plumber to minimize, or even prevent, major plumbing problems. 

Of all the helpful advice experienced homeowners will offer, listen to them when they are offering plumbing tips. The plumbing in your home is essential and important to the daily household routine. A clogged drain or a leaking pipe can be inconvenient and expensive. With routine plumbing maintenance by you and a professional plumber you can possibly prevent the following problems: 

  • Blockages

A blocked and clogged drain can cause as much damage and as many problems as a leaking pipe, including flooding. By keeping your pipes free from blockages and clogs, you’ll decrease the chances of overflowing sinks, toilets, and tubs within your home. This will also extend the lifespan of your plumbing. A couple of plumbing tips to help minimize blockages is to use a drain screen in each sink to catch hair and larger debris that can clog a drain. And pay attention to seemingly minor things you may be washing down the drain, like coffee grounds and grease! They can cause far more problems than you realize.

  • Low Water Pressure

With regular plumbing system maintenance you can catch any build-up of mineral deposits and gunk in the pipes that can decrease your water pressure. You can also catch small leaks where the water isn’t getting to the faucet, making it seem your water pressure is low. 

  • Expensive Repairs

When you catch a clog as it’s building up and get it cleared, you won’t have a busted pipe to fix and you won’t have to deal with the damage it can cause around the pipe. Water is the enemy to any house when it’s left to flow and leak. Keeping your home’s plumbing pipes clean and clear and keeping leaks patched can save you a lot of money. 

What does a maintenance plumber do?

A professional plumber will have a plumbing maintenance checklist they will work through. On that maintenance checklist are: 

  • Check for indications of water damage on the walls or under cabinets
  • Inspect the plumbing pipes for damage or corrosion
  • Check the toilets for leaks and they’re flushing correctly
  • Verify that all faucets in the bathrooms, kitchen and other areas have proper water pressure
  • Check for potential blockages and clogs
  • Inspect the garbage disposal and water heater 
  • Conducting a pressure test to detect any hairline cracks or leaks
  • Perform drain cleaning on all drains

Occasionally, if the plumber determines it is needed, they will perform a lead test of the water and do a video pipe inspection of the sewer lines. These aren’t always included on routine maintenance inspections, however. At the end of the inspection, the plumber may offer you plumbing tips to correct an issue before it becomes an expensive problem.

What is included in preventive maintenance?

Your plumbing preventative maintenance routine will involve everything that is attached to the water system in your home. This includes all sinks, toilets, and tubs. The laundry room, garbage disposal, refrigerator ice maker, and water heater. 

Anything that is attached to the plumbing should be inspected. If you find any issues, make the repairs needed or call a professional plumber. Here, we offer preventive maintenance plumbing tips to follow:

  • Fix any leaking faucet or shower head. A dripping faucet is wasting water and adding up on your water bill.  A dripping faucet left un-repaired can cause extensive water damage. This includes the handles dripping when turned on. Check under the sinks for drips or water stains. 
  • Unclog slow drains.  Any drain that is slow could get worse at any moment. Pour half a cup of banking soda and half cup of vinegar down the drain, wait 15 minutes then pour boiling hot water. This can be done on a weekly basis to keep drains running clear. 
  • Check all exposed pipes for water leaks, including plumbing to all appliances. Every appliance can have a possible leak, including the garbage disposal, ice maker, or water heater.  Always keep a watch for any visible signs of a leaking like water stains on ceilings, walls, and puddles in floor. Be aware of mildew and make sure the drip tray under the water heater and HVAC unit are clear. 
  • Fix leaking toilets by replacing the faulty valve seat seal or the flapper. Make sure the handle is connected to the tank stopper and working. 
  • Watch what is getting flushed or poured down drains. Just because it says flushable, doesn’t mean it should be flushed!  The only things that should ever be flushed is human waste and toilet paper, and never anything that can be reactive down a drain.
  • Check the water pressure from the faucets and showerheads to make sure they are not too high. High water pressure can bust water lines.  
  • Remove the shower and clean the sediment that has built-up. 
  • Drain and flush the water heater to remove the sediment build-up 
  • Check the water heater burner chamber and if you see rust flakes or the flame is yellow, the jets need to be cleaned. 
  • Check the hoses for brittleness, cracks, or leaking and replace if needed. 
  • Have your septic tank inspected and pumped by a professional service. 
  • For houses with a sewer system, have the sewer lines inspected for cracks and tree roots.

How often is it recommended to do plumbing maintenance?

Have your home’s plumbing checked professionally every two years. The exception to this would be for an older home or a home with large trees around, in which case, once a year would be recommended. The checklist of plumbing maintenance for homeowners we provided, along with the plumbing tips offered, should be taken care of weekly unless otherwise stated.
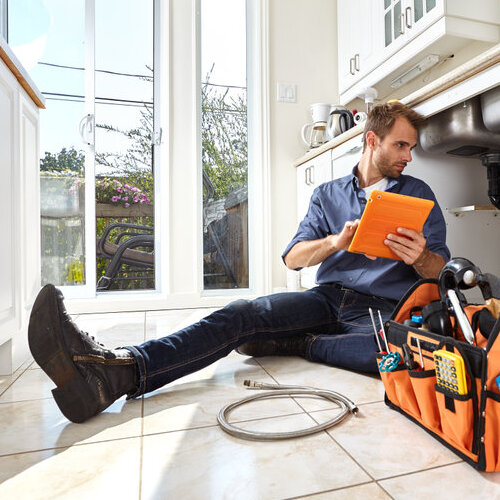
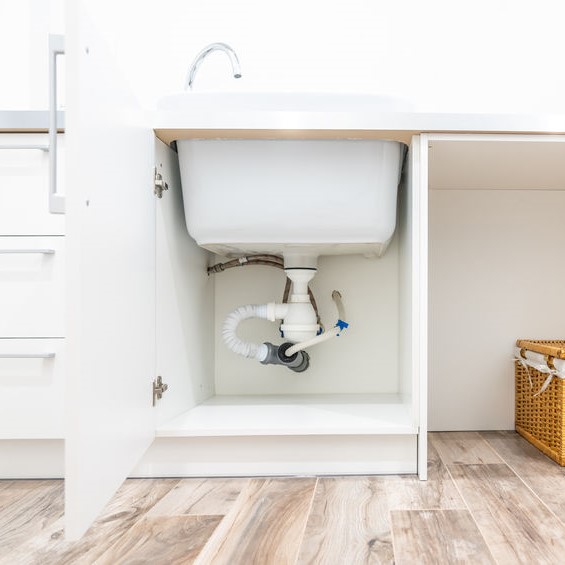
plumber checking the pipes beneath a sink

In Closing

When you learn how to maintain a plumbing system, you’ll find that you’re saving money on water, and you won’t need plumbing repairs as frequently. Commercial or residential building plumbing maintenance is essential in keeping thing running as smoothly as possible. 

What is the Cheapest Way To Remodel a Bathroom?

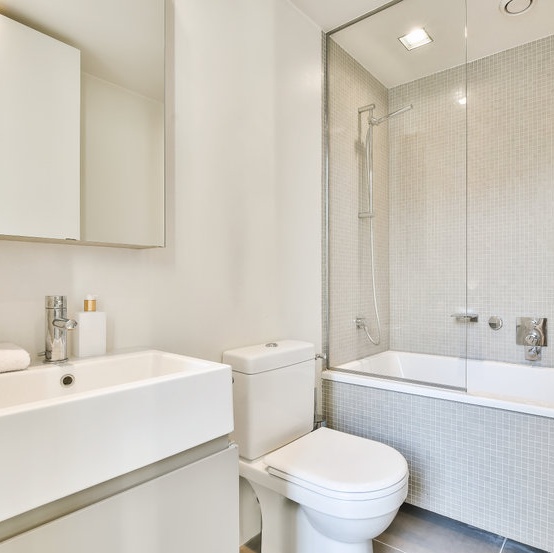
luxury small bathroom

Remodeling your restroom

The bathroom. What can you say about that one room that everyone needs and uses? It may very well be the busiest room in most homes, which means it gets dirty faster, it wears out faster, and yet, we want it pristine and presentable. And that may lead to a bathroom remodel

Any homeowner faced with a bathroom remodel decision will have many questions, typically, the most popular question is, how much will it cost to remodel my bathroom? Especially when budget is a main concern, but it can all depend on how big the bathroom is and how elaborate you want this bathroom remodel.   

In Southern California, a bathroom remodel can be more expensive than an average home in Oklahoma. Experts estimate that the cost of a bathroom remodel in Southern California can be anywhere between $14,000 and up to $18,000. But again, this can all depend on the size of the bathroom and the level of elaborateness. 

So, what is the cheapest way to remodel a bathroom? If you know the time is coming soon as to when to remodel bathroom, start planning now – that is the first step in doing this as cheap as possible. Pre-planning does a lot and if you can afford a consultation with a designer or architect for the more elaborate bathroom remodeling job, great!  

With a plan in writing and drawings and working with a professional that knows how to plan bathroom remodel, you can be assured that you have realistic dreams of your bathroom remodel that your budget and timeline can meet.  

How can I save money on my bathroom remodel?

Here are other steps after the pre-planning that you can do to save money on your bathroom remodel:  

  • Don’t Move The Electrical or Plumbing: Two of the most expensive things you can do in a bathroom remodel job is move the electrical and the plumbing. Every time you move a piece of plumbing, you’re looking at a $5,000 cost. 
  • Frame The Mirror: If your current bathroom has a built in mirror (maybe it was tiled around it), instead of moving it, dress it up with a fantastic frame. 
  • Don’t Toss the Toilet: Unless there is logical plumbing reasons, instead of replacing the entire toilet, just upgrade the seat and lit. That will save money on the toilet and hiring a plumber. 
  • Salvage Finds: Antique stores, resale shops, and salvage yards are gold mines for bathroom remodeling budgets. What was once a pricey piece can be found at a bargain and made into your bathroom remodel focal point. These are the places to find that unique piece that will make the vanity the envy of your visitors. 
  • Don’t Tile It: Tile has been the long standing tradition in bathrooms, but it doesn’t have to be!  Consider using reclaimed wood panels, beadboard, or board and batten. This will make your bathroom more warm and comfortable, and while it may need more maintenance, it will give your bathroom remodel that specialness. 
  • Open Concept Shelving: The bathroom needs to be private, but the shelving can go with an open concept, making the space seem larger without moving any walls. Open shelves, wicker baskets and you got a spacious and colorful bathroom! 
  • Light It Up: Builder-grade lighting rarely has much aesthetic appeal and is typically the first thing homeowners want gone when they plan their bathroom remodel. A bathroom should have a lot of lighting and that can be done on a budget. Adding lots of light to a bathroom is one of the most valuable changes a homeowner can Shop the discontinued shelves at the big box home improvement stores, even if it is last season’s lighting! 
  • Punch With Paint: Even the smallest area painted a colorful pop will do a lot for any bathroom remodel. You can match to your existing tile or go offbeat with something totally opposite and contrasting. 

Other things you can do to get a big change for little money is shop second hand stores for the countertop to go on that unique vanity you’re creating. If tile is what you want, shop the resale shops and the discontinued aisles for leftovers, even shopping online you’ll find some great deals that will you’re your bathroom remodel that unique touch. 

What is the best color for a bathroom?

For small bathroom, stay with bright and light colors. They reflect light and will make the bathroom seem larger; white is always the first suggestion by designers.  For a larger bathroom, there are other colors that can work with a bathroom remodel:

  • Charcoal.
  • Creamy White.
  • Light Blue.
  • Light Green.
  • Pistachio.
  • Soft Gray.
  • Taupe.

How much does it cost to replace a tub with a shower?

For a bathroom remodel that includes converting the bath a tub to a shower, you can expect to budget no less than $6,000 and the more accessories and add-ons you choose, up to $10,000. These are ballpark costs and should include materials and labor. 

Can you remodel bathroom yourself?

If you’re a handy DIY homeowner, sure. Until it comes to the electrical and plumbing, and even if you have the confidence to this yourself, there are ordinances that require permits and inspections. Cities typically will require a certified and license contractor with insurance for permits.

tile bathroom

Is bathroom remodel worth it?

Are you doing this for your own benefit? Yes, if you’re getting more room, more functionality, and a bathroom remodel is needed. Are you doing this for preparation to resell your home? The National Association of the Remodeling Industry states that you’ll recover up to 50% of a bathroom remodel if it is done properly.  

In either case, for your own use or for resell, the most important things to pay attention to for ROI value is replacing the outdated and worn items, updating the fixtures and lighting. A bathroom with more functional space is always a bonus. Call (310) 454-2010 today for your bathroom remodel in West Los Angeles, CA.

Is Pipe Relining Worth It?

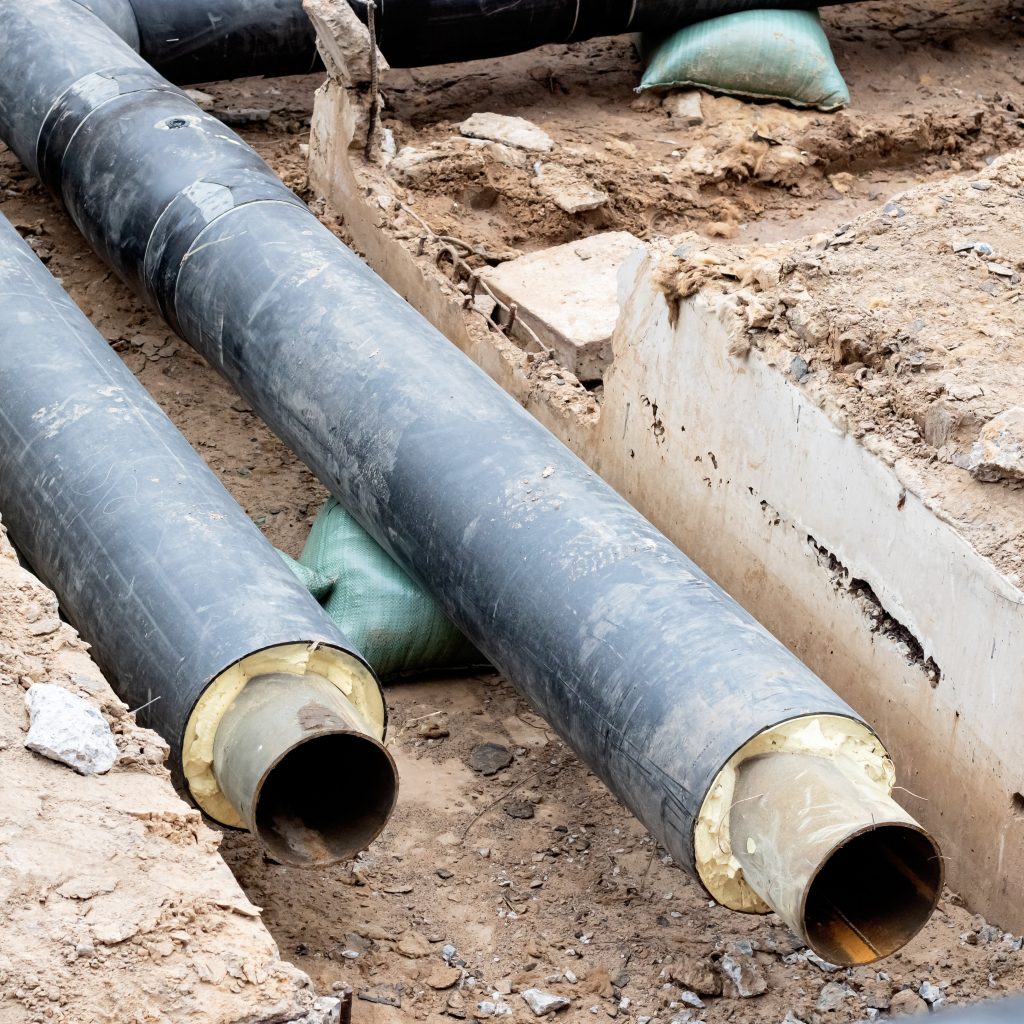
pipes that need relining

How do you reline a sewer pipe?

New, but not brand new for the plumbing industry is sewer relining. What is sewer relining? Sewer relining process is a way for plumbers to repair or replaced backed up, cracked, damaged, and leaking sewer lines. 

Sewer relining is less invasive than the ‘old school’ method that involved heavy equipment and trenching the lawn, a result that homeowners dreaded. At the end of the job, what homeowners will be two small holes in the lawn with renewed existing sewer pipes that will give the decades of problem free plumbing. 

For many situations, pipe relining is the perfect alternative compared to replacing sewer pipes. Your plumbing contractor will offer one or more of the following four methods of sewer relining, each will rehabilitate the pipe’s interior instead of a total replacement job. 

  • CURED-IN PLACE: This method of sewer relining is done by the contractor remotely line the damaged section of the sewer pipe without any trench digging. Once the interior of the sewer pipe is clean and dry, the contractor applies the lining to the problem area and leaves it to cure in place using hot steam jetted into the pipe. This hot jetting molds the lining into all crack and damaged area inside the sewer pipe.
  • PULL-IN PLACE: This is considered to be the best sewer relining method for pipes with larger cracks and gaps. The repair material is installed into the pipe with a steam like heat that pulls the epoxy-saturated liner into the area of the sewer pipe that needs repair. The plumbing contractor creates two access holes. One is used to feed the sewer relining material to the desired location and the other hole is where it is pulled through until it reaches the needed area. The plumber then injects air into the sewer pipe that opens the epoxy sleeve and holds it in place against the inner walls until has dried. 
  • PIPE BURSTING: For sewer pipes that are extensively damaged and needs total replacement, pipe bursting method is used. The plumbing contractor requires physical access to the pipe to start the repair process. This method of sewer relining required space two 4 foot square access pits at each end of the sewer pipeline. A bursting head is placed at one access point and hydraulic power then drags the head through the sewer pipe. As the head makes its way through the sewer line system, it breaks the old pipe apart and the new seamless pipe is pulled behind it. The new sewer pipe is a plastic material that is impervious to tree root intrusion for 100 years or longer.
  • INTERNAL PIPE COATING: Professional plumbers choose the internal sewer pipe coating to repair an existing leaking sewer pipe when that leak is surrounding the soil around it. The area must be prepped by completely draining the pipes to remove any water. Then a thick epoxy coating is sprayed on the sewer pipe interior that permanently seals any cracks and leaks throughout the sewer pipeline.

How does trenchless sewer line repair work?

Trenchless sewer relining is a repair done by soaking a  pipe liner that is made from either felt or fiberglass in an epoxy resin. It is then threaded through the existing damaged sewer pipe. The liner is then inflated, pressed up against the original “host” pipe. The plumber then lets that sit for 24 hours to cure.

How does sewer relining work?

This sewer relining is a trenchless process that doesn’t require the plumber to excavate the lawn, destroy the driveway or sidewalk, or dig up trees. Sewer relining entails inserting a new sewer pipe that is epoxy-saturated tube into the existing sewer pipe. The tube is then inflated and allowed to cure  in place with either bluelight LED technology, hot air, or steam.

How long does sewer relining last?

The warranty for this sewer relining process is typically for 50 years. However, it is estimated that the lining could last up to 100 years, which is double the pipeline’s lifespan.

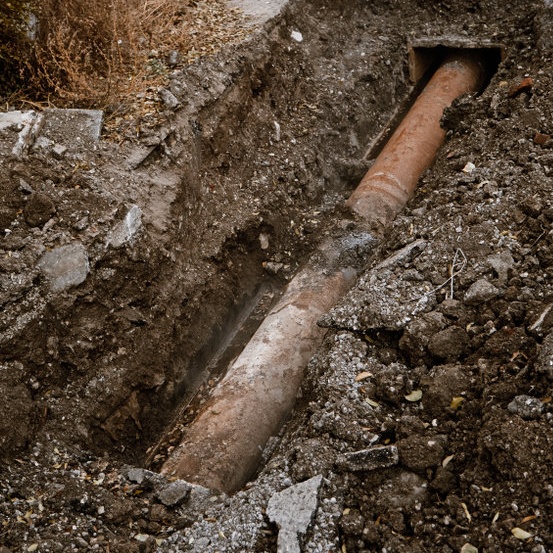
pipe dug up

Is pipe relining worth it?

As a homeowner, if you’re facing sewer relining vs replacement, the sewer relining process is up to 75% less expensive than replacing the sewer line. In addition to the financial savings there, it being a non-invasive with your lawn, driveway, and sidewalks, there is no reconstruction expenses after the plumber leaves. 

If you suspect you have sewer line issues, do an internet search for “plumbers that offer sewer relining near me”, because not every plumber has trained or has the equipment to do this type of work.  Get a couple of estimates and compare them before choosing one, and as always, ask for recent references then follow up with those references. Call (310) 454-2010 today fo your pipe relining needs in West Los Angeles, CA.

How to Tell if You Have a Slab Leak

What is a slab leak?

In California, the ground moves with earthquakes and proximity to the ocean, so it isn’t unusual for homes to have movement. Homeowners are accustomed to this and the repercussions it can create. Like causing a slab leak, detection of that issue is important before it leads to bigger problems.

A slab leaks happens when a water pipe leaks inside or under the concrete slab foundation of a house. A slab leak can be from the incoming water line, the water heater water line, or in the sewage line.

What causes a leak in the slab?

A slab leak can appear to be an insignificant, small issue at first, However I a slab leak detection isn’t successful, costly and significant damage can occur. An unattended slab leak will saturate the soil under the foundation, making floors uneven, doors and windows hard to close or open, and more.

How serious is a slab leak?

Eventually, without slab leak detection and repairs, the foundation, with the house structure, will begin sinking into the ground.

A slab leak creates other problems before it gets to the point of sinking. The annoying problems you’ll have inside your home can be one or all of these:

  • Carpet soaked, tile cracks, wood floors warped: Yes, the first thing to be ruined are the floors aswater seeps into the structure from below.
  • Foul odor and smells:  A slab leak will create a moldy, musty odor, and if it is the sewer line leaking, the smell is worse.
  • Mildew to Mold:  Once the water leak has created mildew, it begins to turn to mold, and that mold will seep into the house just like the water did. The drywall and wood will absorb that water, the mildew and mold will continue growing and potentially creating a health hazard.
  • Damage to the foundation: A slab leak left undetected and unaddressed will weaken the structural integrity of the foundation, the steel supports, and eventually begins to comprise the walls, ceiling, and roof. A cracked or collapsed foundation and structure isn’t far behind.
  • Damage to your landscaping and yard: Sometimes a slab leak is coming from underground water pipe leaks. These leaks begin to flood the landscaping and yard, including any brick or concrete paths and walkways. In-ground swimming pools begin to crack and leak.

Do you know how to spot a slab leak?

Statistically speaking, every home in California is prone to have a slab leak at some point. Because a slab leak can create so many problems, the earlier slab leak detection is done and the repairs that follow, the better. The following are Slab leak signs that every homeowner should be on the watch for:

  • Buckled, separated, warped, floorboards: If your hardwood floors are buckling or tile floors are cracking, it could be from excess moisture from underneath the floor.
  • Water bill increases: If your water bill has had a recent spike but you’re not using any more water than normal, this could be a sign you need slab leak detection.  There are mold detectors that offer water leak detection too.  
  • Damp, wet carpet: Just like floorboards, carpet absorbs moisture and water from under the slab too, creating small swimming pools for ants and other insects. 
  • Random hot spots: A slab leak will cause hot spots in the flooring when it is the water heater leaking. A professional plumber will have a thermal imaging camera set up for slab leak detection.  
  • Mildew or mold: If you are smelling mildew or mold and can’t find the source causing it, you need professional slab leak detection service.
  • Water heater constantly running: When the water heater is constantly heating water, this is a possible slab leak, detection and determination are important and should be one as soon as possible.  
  • Water pressure decreased: If you’re having to run the water longer to rinse your hair or wash the dishes because you have low water pressure, a slab leak detection service is needed. There could be a leak in the pipes somewhere in or under the foundation.
  • Water puddles: When you notice water wicking up from the floor and creating puddles, this is a strong indication that you have a slab leak. Detection service can verify this for you and pinpoint where the slab leak is located.

How do you find a leak under a slab?

As we have mentioned several times already, slab leak detection is important for the health of your family and the safety of your home.  If you still aren’t sure of the indicators we’ve mentioned, we suggest this slab leak detection process:

  • Turn the water off at every faucet and source.
  • Once you’re sure there isn’t any running water inside or outside, look that wat water meter.
  • If you see the needle moving, you have a water leak somewhere.
  • Check water sources like the ice maker or water heater.
  • If there isn’t any obvious signs, schedule a slab leak detection service soon.

How does slab leak detection work?

Professional plumbers have special equipment for slab leak testing, which is more reliable than the methods we have offered here already. There are two different slab leak detection methods:  tracing equipment and static pressure testing or camera pipe inspection. These methods will enable the plumber to determine precisely where a slab leak is located:

Electronic Device

This electronic device makes it possible for a plumbing  technician to perform slab leak detection by listing for water leaks in the house’s hidden water lines. Once a slab leak detection is determined, they use a line tracer system that sends a small electric charge into the line that will find the exact spot leaking.

Static Leak Isolation

This type of slab leak detection involves a hydrostatic pressure testing using sewer video cameras in-line. This enable the plumber to determine where to place the system that will provide them a visual of the sewer system. Then hydrostatic pressure testing is used to determine a slab leak detection for the location. Then inflatable test balls are placed in the system that identifies specific places in the sewer line and provides slab leak detection.

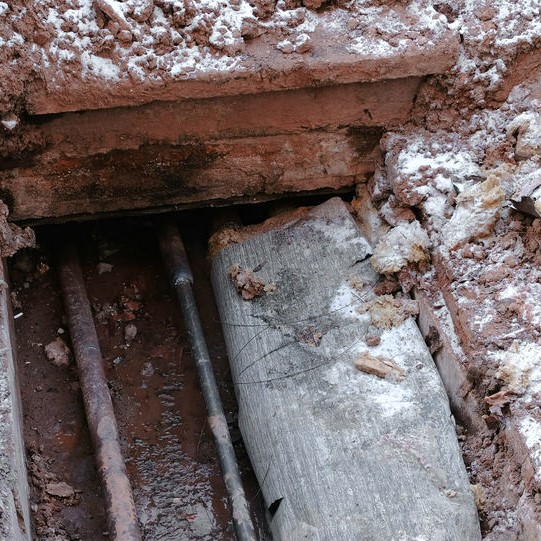
leak through a slab

How much does slab leak detection cost?

Will my homeowner’s pay for the slab leak detection process?

The average cost for a professional plumber to perform a slab leak detection can start as low as $150 and go as high as $400. The level of difficulty will determine the final cost. Will your homeowner’s pay for this slab leak detection process? No, but it may help with the cost of repairs and replacement if the adjuster doesn’t deem it cause by homeowner neglect. This is one good reason why you should do periodic slab leak detection processes yourself from time to time. Get ahead of the issue before major damage and problems happen. Call (310) 454-2010 today for your slab leak detection needs in West Los Angeles, CA.

How do you unjam a garbage disposal?

close up of garbage disposal

Why is my disposal humming and not working?

The garbage disposal is a wonderful kitchen appliance. Always there and ready to do its job, well almost always. There comes a time in the life of every garbage disposal, repair may be necessary. You rake off food from dinner plates, turn the water on and flip the switch, only to notice the garbage disposal is humming, not griding.  

When a garbage disposal stops grinding suddenly, only humming after flipping the switch, it is because of one of these two reasons: 

  • It is jammed
  • The motor is bad

How do I fix a garbage disposal that just hums?

Hearing a humming means the disposal has power, so there probably isn’t any electrical issue. That narrows down your problem to be one or the other issues not letting the disposal do its job. So, does this mean you need a new garbage disposal, or is a garbage disposal repair possible? With a jammed garbage disposal, repair is possible by following these steps: 

  • Turn the power off going to the disposal and unplug the unit too. 
  • Do a visual check for any food or a foreign object lodged in the disposal and remove them by hand, pliers, or tongs. If there isn’t any blockage, proceed to the next step. 
  • With a wooden spoon, gently push the blades manually, rotating them. If this doesn’t fix the issue, move on to the next step. 
  • Manually rotate the flywheel with a ¼” Allen wrench on the bottom of the disposal, turning it back and forth.  Give the disposal a test run and if you’re still just getting a humming sound and the water isn’t draining, you’ll need to call a professional plumber for a garbage disposal repair appointment. 

How do I know my garbage disposal is broken?

A garbage disposal is designed to grind and shred food and send it on down into the sewer line. A properly working garbage disposal will help keep the kitchen pipes clean and clear and when maintained according to the manufacturer’s manuals, you should get 15 years of food grinding and shredding. 

However, this does not mean 15 trouble-free years of grinding and shredding. When it is getting near the end of it expected lifespan, where garbage disposal repair can make it all better, you’ll know it by these five symptoms: 

  1. Noises – Strange or Unusual: A garbage disposal has several moving parts and they all make some noise. However, if you’re hearing a new or peculiar noise, it could be more than something stuck in the blades. With a flashlight shining into the drain, check for something that could be blocking the blades, like a spoon or dishcloth. If there is something, remove it with your hands, pliers, or tongs. If there isn’t anything stuck, then it is probably past garbage disposal repair and time to replace the unit.
  2. Constant Odor: When you’re smelling old food and other unpleasant odors, the garage disposal hasn’t been working right for a while. You can use homemade ingredient mixtures or buy over-the-counter products to eliminate the odor, but if they come back, you’ll need to call a professional plumber. If they can’t find any particles trapped inside the unit, you’re going to need a new one.
  3. Not Turning On: A garbage disposal that won’t turn on could have a serious problem. Push the red reset button on the outside of the unit under the sink. If this starts it working again, you don’t have to worry with garbage disposal repair or replacement. If that doesn’t work, check the electrical panel, and see if the circuit breaker has flipped off. If the unit still won’t turn on, time to call a professional and price a new unit.
  4. The Garbage Disposal Is Leaking: Appliances won’t last forever, even the garbage disposal. If your unit is leaking, it is beyond any type of garbage disposal repair, it is time to replace the unit. Even if it could be repaired, that won’t last forever either. 
  5. Pressing the Reset Button Frequently: The reset button shouldn’t need pressing very often, so if you are having to press it often, it is time to replace your garbage disposal. 
garbage disposal under sink

When I turn on garbage disposal water comes up?

If the garbage disposal is backing water up in the other sink, there is probably a clog in the lines from the garbage disposal to dishwasher. This isn’t just annoying, but unhealthy too because that food is trapped, and the odor will begin to emit through the house. Fortunately, this is one garbage disposal repair you can do yourself and save the money a plumber would charge: 

  1. Fill the opposite sink with 4 inches of water. 
  2. Close off the drain on the garbage disposal side and place a sink plunger on the other drain. 
  3. Pump the plunger up and down rapidly, there should be suction between the drain and the plunger. 
  4. Remove the plunger, unplug the garbage disposal drain and plug the opposite drain, then let water run in the garbage disposal drain. If it isn’t flowing, repeat the process.
  5. If the drain still doesn’t unclog, you’ll need to get under the sink and remove the U-shape pipe called the P-Trap
  6. Next, remove the elbow between the drain and the garbage disposal and check it for clogs. Rinse it out and replace. Still have a clog? 
  7. Time to get the plumbing snake, insert into the drain and turn the handle. Once you feel any resistance, keep turning. That is the clog you’ve it and the purpose of the snake is to push it through. 
  8. Now, turning clockwise while gently pulling the snake out, you should have debris on the end of the snake.
  9. Replace all the pieces you’ve removed and then running hot water in both drains will remove any debris left and allow you to see if there are any leaks. 

What if you wanted to attempt replacing your garbage disposal yourself instead of hiring a plumber. How hard is it to replace a garbage disposal?  If you have even a small amount of mechanical knowledge, installing a garbage disposal isn’t as difficult as you may think. First, you want to make sure you have the right garbage disposal for your plumbing and sink, then you want to make sure you have the right tools. When choosing the garbage disposal, they have garbage disposal without switches or wires! Make sure they will fit your application before making that investment though. 

Every new garbage disposal should come with instructions, but if the don’t, you can find them online.  These are extremely basic steps that we’re sharing here: 

  • Turn off the power.
  • Disconnect the dishwasher hose and waste line.
  • Take the disposal and mounting assembly off.
  • Plug in your new disposal or follow the instructions from the manual at this point if you went with the wireless unit. 
  • Install the drain flange, mounting ring and install the disposal.
  • Connect the disposal and P-trap. 
  • Test run the disposal. 

Need help with your garbage disposal in West Los Angeles, CA? Call Sunset West Plumbing & Rooter Inc. at (310) 454-2010 today!

Are you supposed to empty garbage disposal?

in sink garbage disposal

When you can’t get your garbage disposal to drain, what are you supposed to do?

Is there a method to empty a garbage disposal maybe? Out of all the appliances in a kitchen, a garbage disposal may have the worse job of them all. The garbage disposal or disposer is a hard working appliance, and it tends to get smelly if it isn’t cleaned on a regular basis. 

How do you clean a garbage disposal? Some homeowners say to remove the food buildup on the garbage disposal blades is put frozen orange or lemon peeling in the unit then let them grind up. However, garbage disposal manufacturers and plumbers will tell you not to put peelings in your garbage disposal. Instead, pour a half cup of baking soda and run hot water while the unit is grinding. 

So, that brings us to the question, “What are the worst things to put down a garbage disposal?”. The garbage disposal can easily become a trash can of sorts, so it is no wonder things are tossed in it without any regard to the damage it can cause. The answer is these 5 things you should never put in your garbage disposal are as follows, and surprising peelings isn’t on this list: 

Fats and Grease 

Never drain the butter, fat, grease,  vegetable oil, or any meat trimmings in your garbage disposal. These will create problems from the bottom to the top, starting with the blades. As you keep adding these things, the become solid and other food items start sticking to them. The disposal blades become less effective and the drain gets clogged.  

Animal Bones

Garbage disposal blades are powerful, but if anything can wear them down, it is animal bones. Finished with that fried chicken or BBQ ribs? Put the bones in the actual trash, not the garbage disposal. 

Stringy Foods

Brussel sprouts, celery, string cheese, or any kind of stringy foods do not belong in a garbage disposal. The strings will get wrapped around the garbage disposal base under the blades, wearing the motor out because it can’t spin as it should. 

Pits and Seeds

Oh yeah, that yummy guacamole, or the cherry pie, peach cobbler, and other fruit or vegie dish everyone loves all have pits or seeds. Keep those pits and seeds out of the garbage disposal! Use your strainer and put them in the trash. They will simply bounce around inside the garbage disposal, never going anywhere, just wearing the blades out. 

 Coffee and Tea Grounds

Coffee and tea grounds are a big no-no, which surprises most people. While these may look like a powdery substance, when the get wet, they stick to the sides of the garbage disposal and over time, the drain gets clogged, making the garbage disposal can become sludgy acting. 

Can you plunge a garbage disposal?

Yes you can with a few special steps. Because a garbage disposal handles a lot of food particles, we sometimes have problems with the garbage disposal and sink not draining occasionally. A typical sink plunger will work if the clog is located in the disposal drainpipe. However, a clog in the disposal unit itself needs to be cleared before you can  use the sink plunger. 

How do you unclog your garbage disposal?

Here we provide the steps you need to follow and keep from having to call plumber:

  1. Not sure where the clog is? Turn on the garbage disposal and if it is humming but not turning, that is where the clog is located.
  2. Turn the power off at the main breaker then get under the sink and using an Allen key wrench, stick it in the small opening on the bottom of the unit in the center. Turning it clockwise until it resist, then turn the other way until it resist. Keep going back and forth until the resistance stops. 
  3. Plug the opposite drain with the drain stopper and run water in the disposal side until it is half-full.
  4. With the sink plunger over the disposal drain,  push it down slowly and pull back up. Repeat this process until the water is moving down the disposal side. 
  5. Now, remove the sink plunger and turn the power back on to the garbage disposal. Run water in the drain for a few minutes then turn the garbage disposal on and let any food waste get washed away.         
garbage disposal under the sink

What does it mean when I turn on garbage disposal water comes up?

If there is water backing up in the  kitchen sink when you turn the garbage disposal on, it could be any of the following: 

  • The garbage disposal drain has blockage.
  • You have overused the garbage disposal.
  • The  garbage disposal was installed incorrectly.

Most likely, out of those three scenarios, the first one is probably it and we just gave you step-by-step to take care of the problem. Going forward, you need to be careful what is put into the garbage disposal, by you and others. 

Never attempt to use a garbage disposal without water! The water is the lubricant that makes the garbage disposal operate smoothly. Water also washes whatever you grind down the drain. Call (310) 454-2010 today for your garbage disposal repair needs in West Los Angeles, CA.

How do I stop my faucet from dripping?

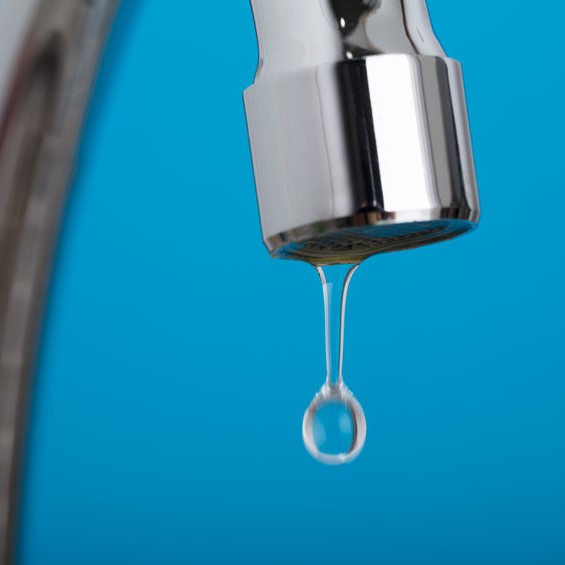
dripping faucet

Leaky faucets in the home

Do you know what a leaky faucet is? Annoying and expensive!  Not much else is as annoying as the sound of dripping like faucet dripping. When we say expensive, we aren’t necessarily speaking of the leaky faucet fix, but the amount of water wasted. One leaky faucet can waste enough water for 180 showers! 

Yup, 180 showers worth of water is wasted by a leaky faucet that is dripping one drip per second. That is over 3,000 gallons of water a year. Even if you take the longest shower ever, you couldn’t use up as much water as a leaky faucet wastes in one year. Imagine how much water is wasted from a leaky faucet when shower is on though! 

Is a leaky faucet dangerous?

An unrepaired leaky faucet may not seem like it can cause much danger, but it can create major problems in addition to the cost to your water bill. A leaky faucet is often indicative of other problems, which we will discuss as this article progresses. 

Can a leaky faucet be repaired?

In most cases, like 99.99% of leaky faucets, repair is possible and a must.  As a homeowner, you can repair a with some basic tools, and video instructions available on YouTube. Some big box home improvement stores offer free classes for the types of home repairs too. If you aren’t a DIY homeowner, calling a plumber sooner than later is recommended when it comes to a leaky faucet. 

While it may seem to be a harmless leak right now, it is wasting water, a natural resource and an expensive luxury having it brought into your home. A two-fold issue that should be remedied as soon as it is noticed. 

What causes a leaky faucet?

  • O-Ring ISSUES: O-rings are a common issue for a leaky faucet. This small rubber ring is found in the valve stem can be damaged over time and become loose. This will cause a leaky faucet just under the faucet handle and a simple fix is to replace the O-ring. If the leak faucet is around the base of the spout, you’ll need to replace two O-rings. However, if the faucet spout has pitted, common where there is hard water, new O-rings aren’t going to fix the leaky faucet and you’ll need to replace the entire faucet. 
  • Valve Seat CORRODED: A leaky faucet can often be caused by a corroded valve seat. This is where the compression mechanism connects the valve and cartridge is seated against. If your faucet has brass internal parts, you may need replace the faucet. 
  • Damaged or LOOSE WASHER: If you have a leaky faucet after turning the water off, this is usually caused by a damaged or loose seat washer, a common issue. These washers in newer faucets are usually a plastic valve cartridge that will need to be replaced occasionally. Some also have springs that should be replaced at the same time. 

Why does my faucet drip after I turn it off?

A faucet that continues to drip after it has been turned off is usually a faulty cartridge or stem. The mechanism is an in-line shut-off valve and if the rubber washers are worn, it allows the water to continuously run, aka leaky faucet. Replacing the rubber washers will usually fix this type of leaky faucet. 

If your faucet is the cartridge style or disc ball style, there are several metal and plastic parts that can deteriorate and wear out. Mineral deposits also accumulate around them so they can’t seal as intended by design.  You can use white vinegar to clean these parts will usually fix this leaky faucet problem. 

water coming from faucet

Why is my outside faucet leaking from the top?

There could be a couple of different issues going, one or all of the following: 

  • Water leaking from the spout: Disassemble the faucet and replaced the washer under the valve.
  • Leaky faucet around the handle: Disassemble the faucet and replace the seal and spring. 
  • Vacuum breaker leaking: Replace the circular cap on the faucet top behind the handle.

Okay, it is just a leaky faucet, how big of a problem could a few drops of water cause?  The flip side to that question would be: For something that is so easy to fix, why wouldn’t you? In the case of procrastination in fixing a leaky faucet, you could be paying dearly later on, probably sooner than you may think. 

Your Water Bills: Utilities are high enough as it is and there aren’t too many of us that are fond of paying them. If you have just one leaky faucet, your water bill is increased by 10 percent each month. 

Environmental Damages:  The EPA (Environmental Protection Agency) reports that the average household with a leaky faucet is wasting as much as 10,000 gallons of water in one year. That is almost 300 loads of laundry! 

Additional Damage to Your Home: A leaky faucet is putting stress on the plumbing and if you have a clogged drain, the backup and overflow can cause even more damage. 

Need help with a leaky faucet in West Los Angeles, CA? Call (310) 454-2010 today!

Will Coca Cola Unclog a Drain?

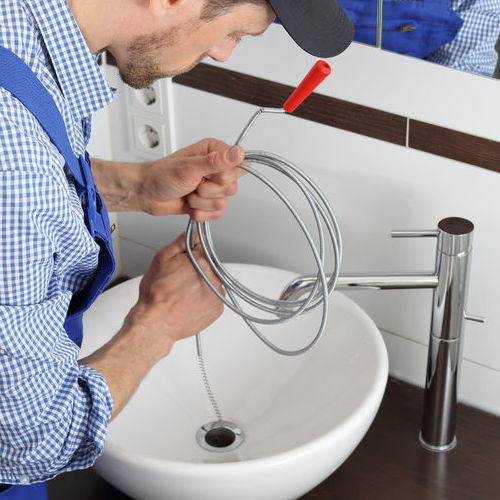
A Plumber Snakes a Bathroom Sink.

Will Coca Cola unclog a drain?

Clogged sinks or tubs can be annoying, but you may have some common household items available that will provide effective clog removal. One of those items might be in your refrigerator right now—Coca Cola. That’s right, Coca Cola, or any cola product, can be used to unclog drains. These drinks are full of phosphoric acid, which is a great cleaner. Colas are actually a better choice than a much more caustic and corrosive off-the-shelf chemical drain cleaner. 

To clear a drain with cola, you’ll need at least a two-liter bottle of the drink. It needs to be at room temperature before you pour it down the drain. Once it’s reached room temperature, you pour it down the drain and let it fizz for about an hour so the phosphoric acid does its job. Colas are also good for removing lime scale. Make sure to rinse your drains well to get rid of the syrupy residue after the clog is removed. If you have stubborn clogs or your drains are damaged and need expert drain repair and clog removal in West Los Angeles, CA, you can always count on the team at Sunset West Plumbing & Rooter Inc.. Get help today by calling (310) 454-2010.

How do you unclog drains?

Drains can get clogged in a variety of ways from hair to grease to mineral build-up in your pipes. Clog removal can be a task you can perform yourself or you can let professionals like those at Sunset West Plumbing & Rooter Inc. help you. When you do unclog a drain yourself, it’s best not to use off-the-shelf chemical drain cleaners. Repeated use will damage your pipes. It’s preferable to try the following methods:

  • Boiling water often works on simple clogs. Just heat water to boiling and pour it down the drain after removing as much standing water as you can. Pour salt down the drain beforehand for extra help. Rinse with hot water after the clog is cleared. 
  • For kitchen sinks, check your garbage disposal, as clogged disposal can sometimes cause water to back up in your sink. Run the disposal to see if you can clear the clog. Otherwise, you may need to have your disposal repaired or unclogged.
  • Use a mixture of baking soda and vinegar or baking soda and salt. When using vinegar, pour the mixture down the drain, and after it stops bubbling, wait 15 minutes and rinse with hot water. When using salt, you’ll have to wait a few hours to allow it to work before rinsing with boiling water.
  • Plungers are very useful tools to have around for clog removal. To create a tight seal before plunging, fill the sink with enough water to cover the bell of the plunger. 
  • Use a bent wire clothes hanger to remove hair and other debris from the pipe. 

How do I unclog a drain naturally?

When you have minor clogs, it’s better to use natural remedies for clog removal rather than harsh chemical cleaners that can damage your pipes. Baking soda and vinegar are two of the better natural ingredients for cleaning clogs. For most drains, you need a mixture of 1 cup baking soda and 1 cup vinegar. All you need to do is simply pour boiling water down the drain and then add the baking soda and vinegar. Let them bubble and fizz for about 15 minutes before rinsing the drain with more boiling water. Baking soda and salt also work to clear drains.

What is the best drain clog remover?

While baking soda, vinegar, and hot water are some of the best natural drain cleaners. But, they only work for minor clogs. Tougher clogs will require stronger materials. While it’s best not to use corrosive cleansers, there are stronger cleansers on the market today that will not harm your pipes. For clog removal using an off-the-shelf cleanser, look for an enzymatic cleanser like Bio Clean. If you want to avoid cleansers altogether, you might want to buy a manual plumber’s auger or snake. You still have to be careful not to damage your pipes using snake tools but snakes are the preferred tool plumbers use to remove clogs. With cleansers and tools follow all directions.  

Removing clog in sink

For clog removal in kitchen and bathroom sinks, probably one of the best tools to have around is a plunger. For best effect with a plunger, fill the sink with water until it covers the plunger’s bell. You’ll have to make vigorous strokes with the plunger until you hear the clog get suctioned from the drain.

What destroys hair in a drain?

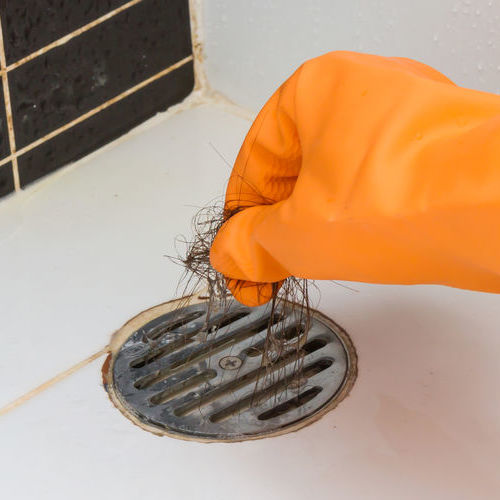
In showers, tubs, and bathroom sinks, hair is often the main culprit that causes clogs. Hair is also tough to remove as it clumps with soap scum and other materials to create a clog. While the most effective way to remove hair from a drain is to snake it out with an auger, once again, for a natural way to dissolve hair, use baking soda and vinegar. Of course, chemical drain cleaners will work, but you still risk damaging your pipes. 

Clog removal washing machine

Clog removal for washers is similar to other clog cleaning methods. If the clog is deeper than the trap, you can clear it with baking soda and hot water or use an auger. Tougher clogs might require a high-pressure wash with a hydrojetting system. If it’s the trap that’s clogged, you will have to unseal the bottom of the trap to allow the water and dirt to drain out. 

Sewer clog remover

A sewer stoppage will typically require the help of a plumber. Clog removal often requires the line to be snaked but serious clogs or blockages like tree roots might require the plumber to use a hydrojetter which sends bursts of water at high pressure to break through the blockage. To find the clog, plumbers may have to send a camera down the line.

Hair Being Removed From a Drain.

Drain clog removal service

If you are contending with a major clog and need help fast with clog removal in West Los Angeles, CA, look to the professionals at Sunset West Plumbing & Rooter Inc.. We’ll get your clogs clear fast and effectively. Get help today by calling (310) 454-2010.

Can the water heater be repaired?

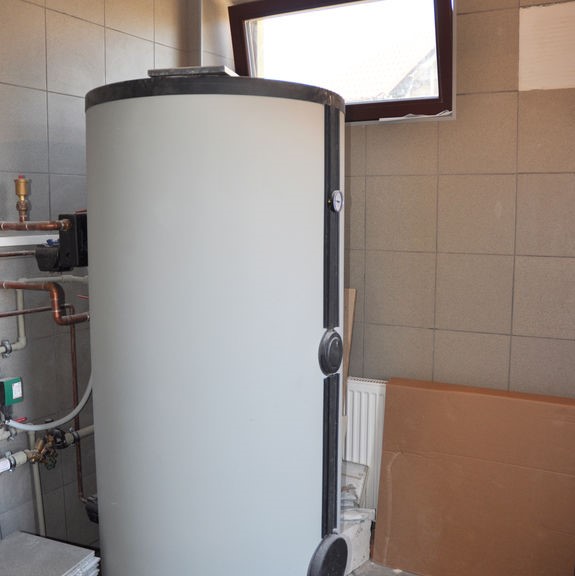
water heater in a bathroom

What would cause a hot water heater to stop working?

What good is a water heater that isn’t heating water? Or worse, one that is leaking all over the garage floor! If this happens to you, this doesn’t necessarily mean you need a new water heater. A water heater repair is possible, depending on the age and model of the heater and the problem. If you have a choice between water heater repair or replacement, the first option is probably going to be the least expensive.  

There are a few things that can cause your water heater to quit, some of them a homeowner can fix, and others may need a professional water heater repair service: 

  • Power isn’t getting to the water heater
  • Thermostat went out
  • The upper heating element has burned out

The first thing you want to do is check the circuit breaker. It may need to be reset or blown a fuse replaced. If it trips the breaker again or blows a fuse, you’ll need to call a professional electrician.

The next thing to check is the thermostat. If it is getting power but not cutting on to heat the water, replace it, or have a water heater repair service call to replace it. 

The last check is the heating element. If the water heater is getting power (first step) and the water isn’t getting hot, replace the element. Some water heaters, this step is easy. If you’re not comfortable with doing this, call a professional water heater repair service.

Do you call a plumber to fix a hot water heater?

Well, it can depend on the problem you’re having with your water heater as we described one issue above, the circuit breaker or fuse box that would need an electrician.  What about other issues though, do you call an electrician or a plumber, or maybe an HVAC tech.

The first call for water heater repair should be to a professional plumber. From there, they will determine if there is additional professional service needed. Some electrical and HVAC issue a plumber can handle, some issues require certification and licensing. 

A few specific issues when to call a plumber would be:

  • Strange squealing, whistling noises coming from the water heater
  • Rusty water 
  • Low pressure for the hot water
  • No hot water 
  • Leaking water from water heater
  • Gas pilot light keeps blowing out

A few example problems that require a professional electrician:

  • Circuit breaker trips 
  • Fuse keeps blowing or fuse box overheats
  • Loose wiring 

What causes the reset button to trip on a water heater?

The reset switch is for your safety, although it can be aggravating. It usually trips because something isn’t working right with the water heater, and the water is getting too hot for user safety. Why is the water getting too hot is more the issue with the reset button. Here are a few issues of reset buttons: 

A water heater’s working is basic. The water in the tank is pressurized and fills and heats from the bottom. There are an upper heating element and thermostat and a lower heating element and thermostat. If the element or thermostat goes out on either one, it will flip the reset button. 

In addition to the elements or thermostat that trip the reset button, the following are issues that may flip the reset button, or you may need a water heater repair:

  • A bad high-limit switch is bad.
  • Loose wiring in either of the heating elements.
  • One of the heating elements has short. 
  • It could be how the water is wired, meaning the wiring in your house may be causing the reset button to flip.

What are the signs you need a new water heater?

Here are some indicating signs that water heater repair isn’t going to enough:

Water Heater Is Outdated

Find the serial number tag on your current water heater. With most manufacturers, the first two numbers on the serial number are the year the unit was manufactured. Or visit the manufacturer’s website or help in determining the age. If the unit is ten years old – time for a new, more efficient model. 

Water is Rusty 

If the hot water is coming out rusty, that indicates the inside of the tank is rusted.  If you don’t replace the unit soon, it will eventually spring a leak, not to mention, you’re bathing, cooking, and drinking that rusty water. 

Leaking Water Heater

The metal expands as it heats up, and if there is a slight fracture in the water heater tank, it can start leaking. A small leak will eventually become a bigger problem as it begins to damage the basement, garage, or utility closet where the water heater is installed. Before you decide to buy a new heater, you may be able to do water heater repair leak by checking all the fittings and make sure they are tight or need replacement. 

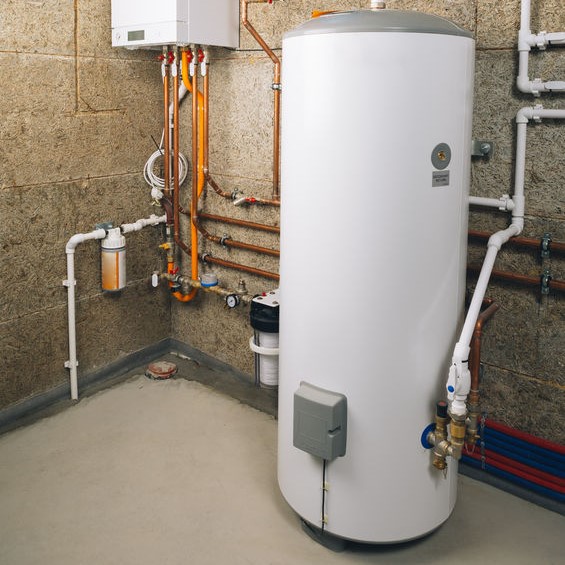
installation of water heater in basement

How do you know if your water heater is going to explode?

Exploding water heaters are rare, but when it happens, it is devastating and can be deadly. If you have any of the following, do not call for water heater repair, but water heater replacement: 

  • Leaking PRV: A leaking pressure relief valve is designed to let off extremely high pressure from the tank. If it is leaking, it could explode.
  • Rotten Egg or Sulfur Odor: If you are smelling rotten eggs or sulfur from your gas water heater, you have a gas leak. Leave the house immediately and call the gas company. 
  • Knocking and Popping Sounds: If your water heater is knocking and popping, it is either going to quit or explode. 
  • Faulty Install: A water heater that isn’t installed correctly can leak, corrode faster, and short out, all before it explodes.

If your water heater isn’t providing enough hot water or doesn’t stay hot for a good shower, call a plumber that offers water heater repair service. It may be repairable; you may need to replace it. But a professional plumber can tell you, either way, do an internet search for “water heater repair in my area” and get quotes for service calls. Call (310) 454-2010 today for your water heater repair.

Why Did My Sprinklers Stop Working?

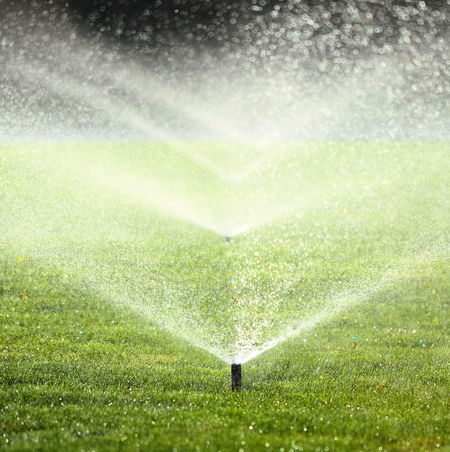
lawn sprinkler repair

How Do I Fix My Lawn Sprinkler System?

Do you have a lawn sprinkler system? These admirable systems are able to automate the watering process, making it easier for you to go about your life without working on your lawn. However, if your sprinkler system is displaying unusual problems, it is important for you to seek out lawn sprinkler system repair and maintenance. The materials and tools that you will need for the procedure should be noted. If there is a malfunctioning sprinkler head, you will need to use a small shovel or spade to remove the sprinkler head and riser. After you have excavated these parts, you will need to inspect the riser for damage. At that point, you will need to replace any damaged components. Before you install a new riser, you will need to wrap the ends with plumbers tape.

Why Did My Sprinklers Stop Working?

Are you wondering why your sprinklers stopped working? The answer may be quite simple. The first thing that you should do is go to one of the irrigation valves and turn the solenoid a quarter-inch to half an inch counter-clockwise. If the valve happens to open and the sprinklers turn on, then you will know that the valve is working. Subsequently, you will need to check the controller and the field wiring. If the valve did not turn off the sprinklers, then you will know that the water to the valves is off still.

How Long Do Sprinkler Heads Last?

If you are wondering how long your sprinkler heads will last, you may be pleasantly surprised by the answer. In general, the life expectancy of a sprinkler system is about twenty years. This is an average. If the components are taken separately, good quality sprinkler heads will last anywhere from between ten to fifteen years. Inexpensive sprinkler heads will only last about two or three years.

Is it Bad to Water Grass at Night?

If you are looking for the best time to water your lawn, you are in luck. Apparently, the best time to water your grass is in the early morning. Specifically, it is best to do so before ten o’clock a.m. The answer to why it is bad to water grass at night might surprise you. A lawn that is wet at night is conceivably the perfect condition for fungus to grow. A fungus is understandably a bad development for your lawn and for your household. Another thing that is bad for your yard is cutting the grass too short.

What is the Best Sprinkler System Brand?

Are you looking for the best sprinkler system brand? If so, you’ve come to the right place. Please review the following brands of sprinkler systems to find out more.

  • Rain Bird. This brand was founded in 1933 and has been a respected sprinkler brand for many, many years. Rain Bird also provides products and services available in over one hundred and thirty countries.
  • Hunter. This sprinkler system brand holds over two-hundred and fifty product patents and forty trademarks. The Hunter brand offers a diverse product line that includes spray sprinklers, central controllers, and weather sensors.
  • NDS. This company began in 1972 when it designed and manufactured the first plastic catch basin. Afterward, NDS created lots of relevant products that appealed to consumers in both the residential and commercial markets.

How to Fix Lawn Sprinkler System

Are you looking to fix your lawn sprinkler system? If your sprinkler system is experiencing issues, it will be important for you to determine the cause and the right course of action. Is the problem is with a broken sprinkler head, you will need to carefully excavate the area. You will need to carefully remove the old sprinkler head. Next, you can replace it with a brand new sprinkler head that is suited to the system. After you have successfully installed the new sprinkler head, you can then test the system to see if it is functional. After you have tested it, you can then replace the grass that you have previously excavated.

How to Fix Lawn Sprinklers

You will need a series of tools and materials for a lawn sprinkler repair. It’s important for you to maneuver forward successfully, and thus you will need to know what you are getting into. If you are looking to replace just a few sprinkler heads, make sure to review your sprinklers and perform measurements. After purchasing your new sprinkler heads, which you can do on the internet or at a local hardware store, you will have some of the things that you need. You will also need a small shovel or a spade. The area around each of the sprinkler heads that you are looking to replace will need to be properly excavated. 

Next, the sprinkler head and riser will need to be removed. Inspect the riser for damage. It may need to be replaced. All damaged components will need to be replaced. Before you install a new riser, you will need to wrap the ends with plumber’s tape.

Lawn Sprinkler Repair

If you are looking to have a professional lawn sprinkler repair person come to your home to service your sprinklers, it will behoove you to find the right company or individual. There are a number of ways for you to locate a good lawn sprinkler repair company. The first thing that you can do is ask a friend or neighbor for a referral. The second thing that you can do is conduct an internet search with relevant search terms.

lawn sprinkler repair

Lawn Sprinkler Repair Service

As previously stipulated, there are a number of avenues for industrious homeowners to pursue. An excellent lawn sprinkler repair service is usually only a phone call away.

If you are in search of lawn sprinkler repair in West Los Angeles, CA, it’s important for you to find the best experts for the job. Our professional company is here to help. You can reach us at (310) 454-2010.